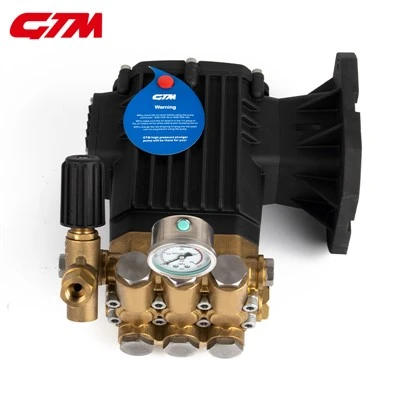
Adjusting the pressure of a plunger pump is a critical process that directly impacts its performance and the efficiency of the overall system it’s integrated into. As a seasoned plunger pump supplier, I’ve encountered numerous scenarios where proper pressure adjustment was the key to resolving operational challenges and optimizing productivity. In this blog, I’ll share comprehensive insights into how to adjust the pressure of a plunger pump, covering the fundamental principles, step – by – step procedures, common issues, and safety considerations. Plunger Pump
Understanding the Basics of Plunger Pump Pressure
Before delving into the adjustment process, it’s essential to understand how pressure is generated in a plunger pump. A plunger pump works on the principle of reciprocating motion. The plunger moves back and forth within a cylinder, creating a vacuum during the suction stroke to draw fluid into the pump chamber and then generating pressure during the discharge stroke to force the fluid out.
The pressure output of a plunger pump is determined by several factors. The size and design of the plunger play a significant role. A larger – diameter plunger can displace more fluid per stroke, potentially leading to higher pressure, assuming the power source can support the increased load. Additionally, the speed of the plunger’s reciprocating motion affects the pressure. Faster strokes can result in higher flow rates and, under certain conditions, increased pressure. However, it’s crucial to note that the pump’s motor or power source must be capable of maintaining the required speed and power to achieve the desired pressure.
Another critical factor is the system’s resistance. The pressure in the pump needs to overcome the resistance of the pipeline, valves, and any other components in the fluid – delivery system. For example, if the pipeline is long or has a small diameter, it will create greater resistance, and the pump may need to generate higher pressure to maintain an adequate flow rate.
Step – by – Step Guide to Adjusting Plunger Pump Pressure
- Safety First:
Before starting any pressure adjustment, ensure that the pump is turned off and all power sources are disconnected. Wear appropriate personal protective equipment (PPE), such as safety glasses and gloves, as the pump may contain high – pressure fluids that can cause injury if released unexpectedly. - Locate the Pressure – Adjusting Mechanism:
Most plunger pumps are equipped with a pressure – adjusting valve. This valve can be either a mechanical or an electronic device. In mechanical pumps, the pressure – adjusting valve is often a screw – type or a spring – loaded mechanism. In electronic pumps, it may be controlled through a digital interface or a control panel. - Understand the Pressure Rating:
Refer to the pump’s manual to determine the maximum and minimum pressure ratings. Exceeding the maximum pressure can damage the pump and pose a safety risk, while operating below the minimum pressure may result in inefficient performance. - Initial Inspection of the System:
Check the entire fluid – delivery system for any blockages, leaks, or improper valve settings. A blocked pipeline or a leak can significantly affect the pressure and the overall performance of the pump. Fix any issues before proceeding with the pressure adjustment. - Pressure Adjustment:
- Mechanical Pumps: For screw – type pressure – adjusting valves, use the appropriate tool (usually a wrench) to turn the screw. Turning the screw clockwise typically increases the pressure, while turning it counter – clockwise decreases the pressure. Make small adjustments, usually a quarter – turn at a time, and then observe the pressure gauge.
- Electronic Pumps: Access the control panel or digital interface. Navigate to the pressure – adjustment settings. Use the up and down arrows or the keypad to increase or decrease the pressure setpoint. Enter the desired pressure value and confirm the setting.
- Monitor the Pressure Gauge:
After each adjustment, wait for a few seconds to allow the pump to stabilize. Read the pressure gauge to see the actual pressure. If the pressure is not at the desired level, make further small adjustments until the target pressure is achieved. - System Testing:
Once the pressure is set, turn on the pump and run the system for a short period. Check for any abnormal noises, vibrations, or leaks. If everything appears normal, the pressure adjustment is likely successful.
Common Issues During Pressure Adjustment
- Inability to Reach the Desired Pressure:
This can be due to several reasons. A worn – out plunger or a damaged seal can cause fluid leakage within the pump, reducing the effective pressure output. Check the plunger and seals for signs of wear and replace them if necessary. Another possible cause is a blocked inlet or outlet, which restricts the fluid flow. Inspect the pipelines and valves for blockages and clean or replace the components as needed. - Over – pressurization:
Over – pressurization can occur if the pump’s pressure – relief valve is malfunctioning. The pressure – relief valve is designed to open when the pressure exceeds a safe level, diverting excess fluid back to the inlet or a low – pressure area. Check the pressure – relief valve for proper operation. If it’s stuck or damaged, replace it immediately. - Fluctuating Pressure:
Fluctuating pressure may be caused by an inconsistent power supply, a problem with the pump’s motor, or air trapped in the system. Ensure that the power supply is stable and check the motor for any signs of malfunction. To remove air from the system, open the bleed valves (if available) and allow the air to escape until only fluid flows.
Safety Considerations
- Pressure Relief:
Always ensure that the pump is equipped with a properly functioning pressure – relief valve. This valve acts as a safety device, protecting the pump and the entire system from over – pressurization. Regularly test the pressure – relief valve to ensure its reliability. - Fluid Handling:
When working with high – pressure fluids, be aware of the potential hazards. High – pressure fluids can cause serious injury if they come into contact with the skin or eyes. Use proper fluid – handling techniques and ensure that all connections are tight to prevent leaks. - Electrical Safety:
If the pump is electrically powered, follow all electrical safety procedures. Keep the pump and its control panel dry and away from water. Do not touch the electrical components with wet hands.
Conclusion
Adjusting the pressure of a plunger pump is a task that requires a good understanding of the pump’s operation, careful attention to detail, and strict adherence to safety procedures. As a plunger pump supplier, I’ve seen firsthand how proper pressure adjustment can enhance the performance and longevity of the pump. Whether you’re using the pump for industrial processes, water treatment, or any other application, following these guidelines will help you achieve optimal pressure settings.
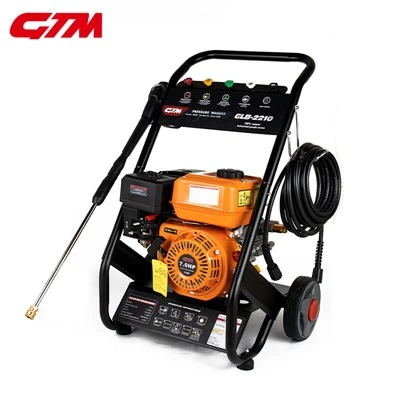
High Pressure Washer If you’re in the market for a high – quality plunger pump or need further assistance with pressure adjustment or any other pump – related issues, I encourage you to reach out to us. Our team of experts is ready to provide you with personalized solutions and support to meet your specific requirements. Contact us to start a productive discussion about your procurement needs.
References
- "Pump Handbook" by Igor J. Karassik, Joseph P. Messina, Paul Cooper, and Charles C. Heald.
- Manufacturer’s manuals for various plunger pumps.
- Industry standards and guidelines related to pump operation and maintenance.
Zhejiang GTM Hi-Tech Intelligent Equipment Co., Ltd.
We are one of the most experienced plunger pump manufacturers and suppliers in China, also support customized service. Please feel free to buy discount plunger pump for sale here from our factory. Quality products and reasonable price are available.
Address: No.5 of Changjiang Road, 2nd Economic Development Zone of Wenling, Zhejiang, China
E-mail: yehuanting1@hongyemfg.com
WebSite: https://www.gtmplungerpump.com/
